CloudIM Support
CloudIM is available only through Riverbed IQ Support. Contact Riverbed IQ Support to learn how to activate the CloudIM feature.
CloudIM requires an AWS IAM user with limited read access; see the Create an IAM User section, below, for details.
CloudIM is a service to discover, track, and monitor cloud assets across multiple cloud providers. It is designed explicitly to address the challenges of the hybrid cloud environment. Leveraging Riverbed’s deep experience in infrastructure, network, and application monitoring,CloudIM answers questions related to the health, resilience, and investment of critical applications. The first version of CloudIM incorporates telemetry provided by Riverbed applications and AWS data to show a common transaction and infrastructure view in the Riverbed IQ Platform.
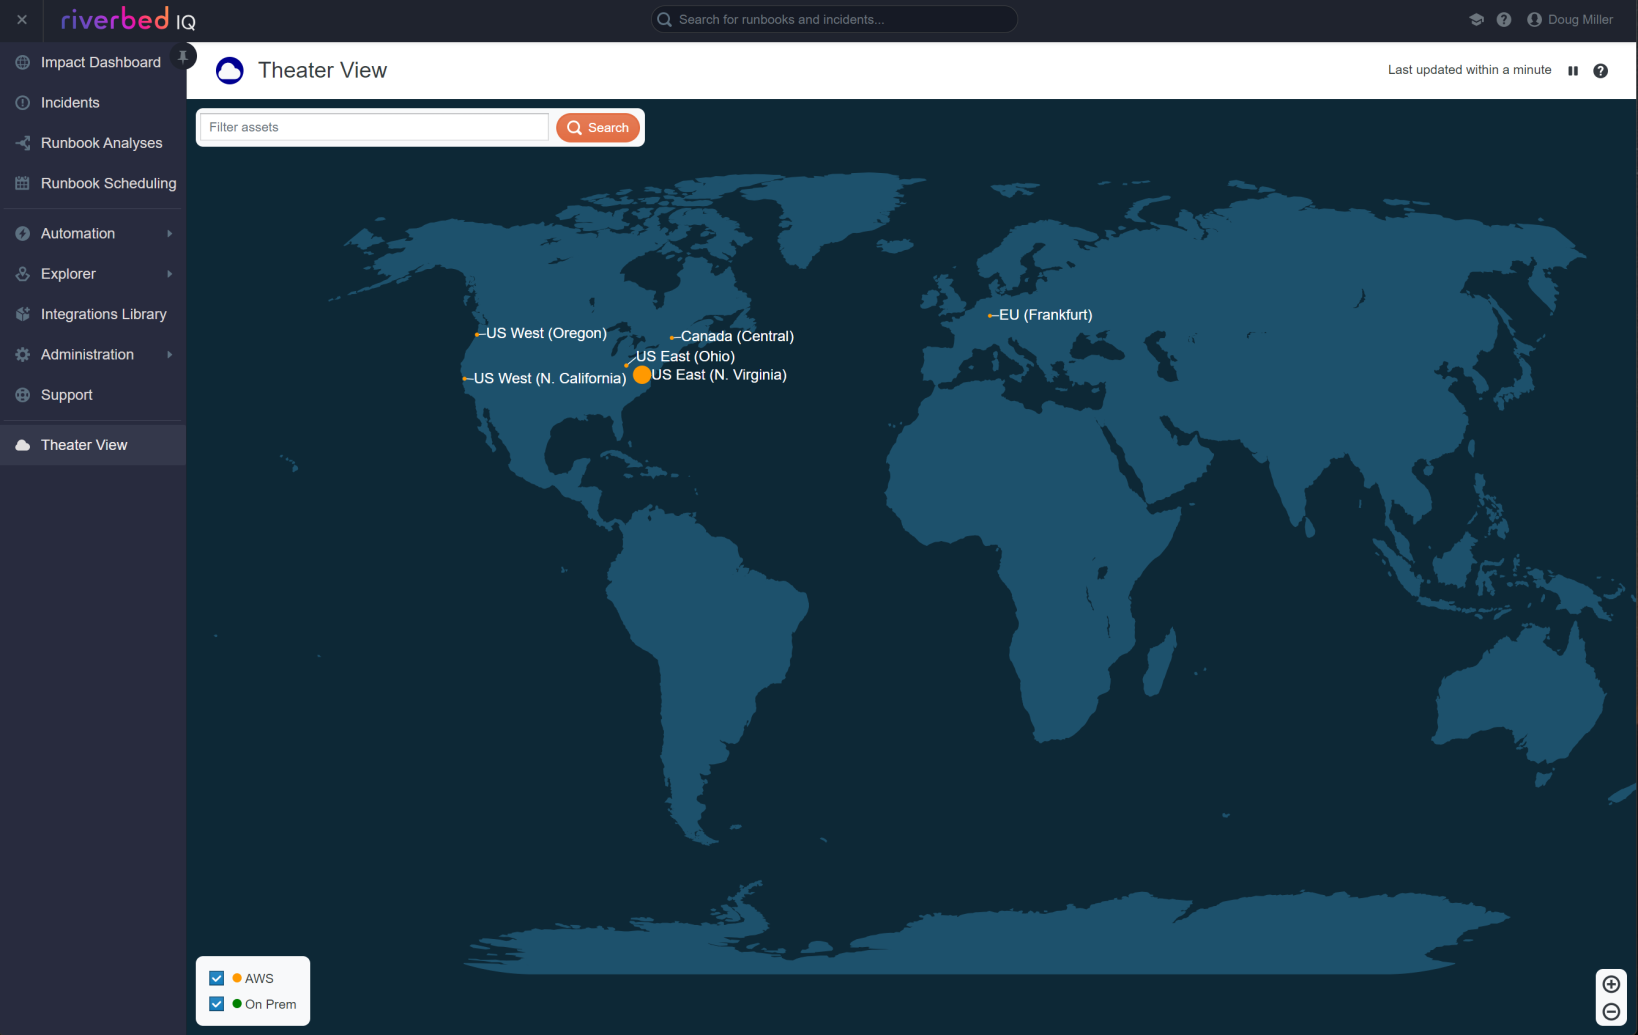
Monitoring cloud and on-premise assets together often requires an inconveniently eclectic mix of tools and practices. CloudIM provides Riverbed IQ with a Theater View of customer assets and corresponding drill-down views of data. These simplify observability across multiple providers, rendering complicated service delivery and management process details unnecessary.
Click Theater View in the Navigation pane to open its page:
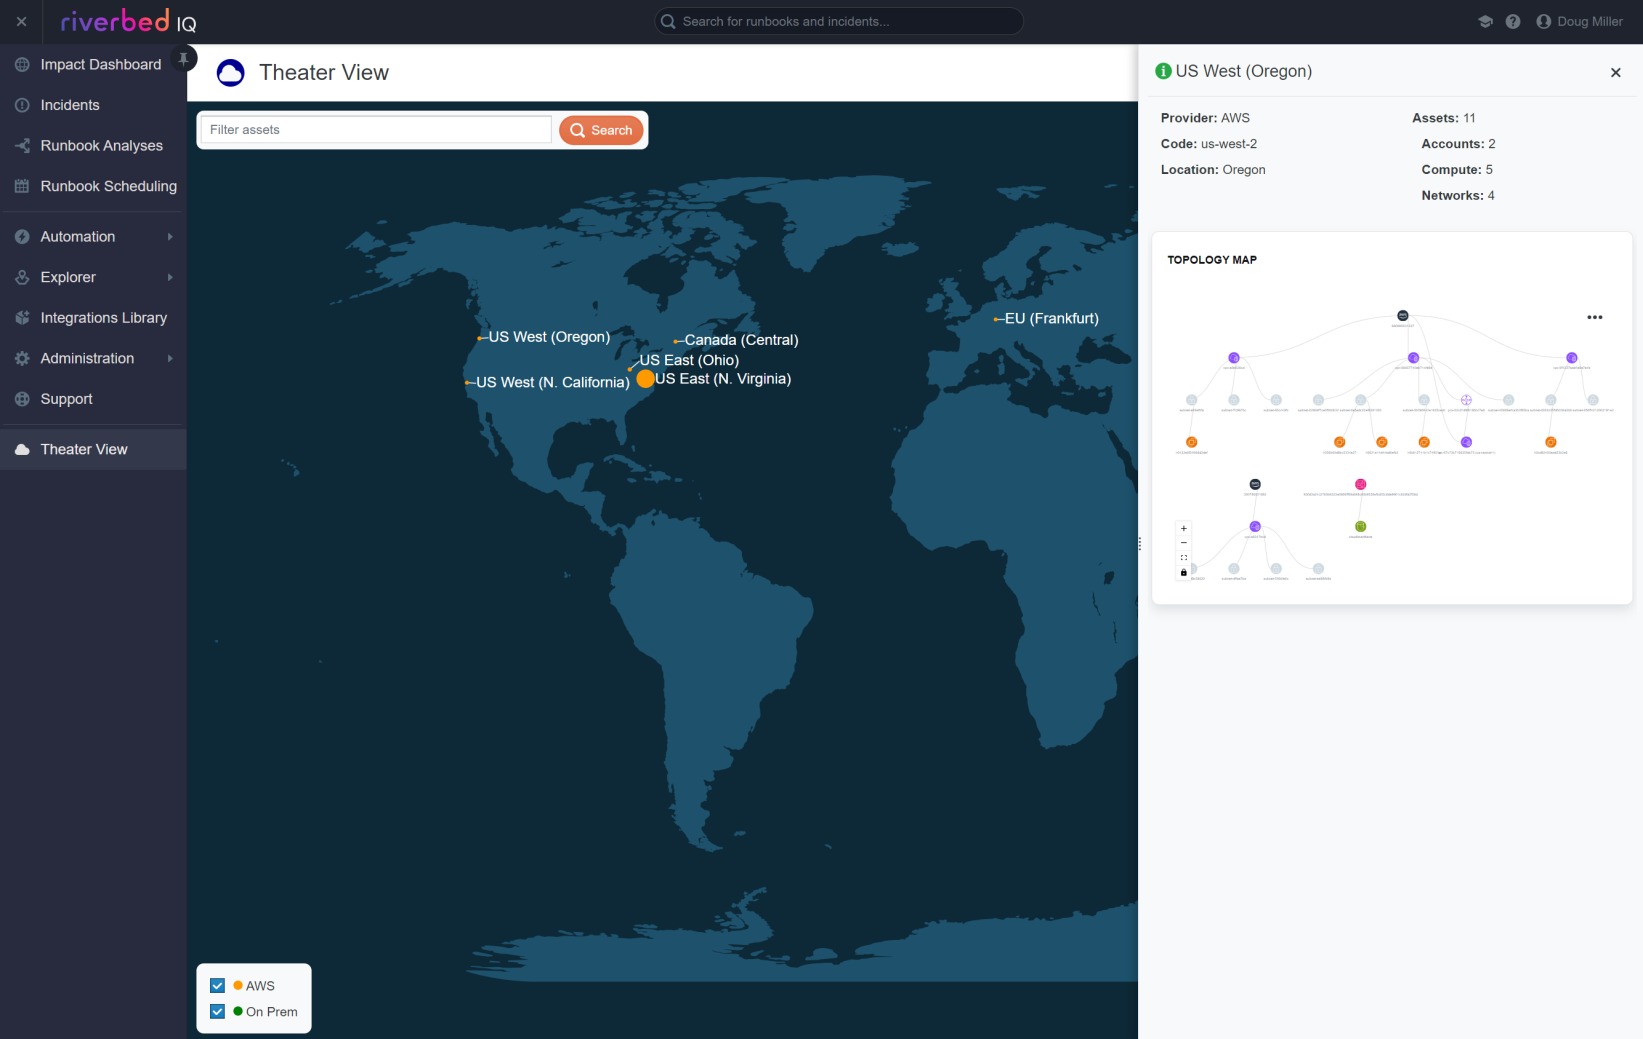
Click on a site in the Theater View to see its Topology View:
Create an IAM User
To create an IAM user for use with CloudIM:
-
Sign in to the AWS Management Console.
-
Navigate to the IAM Dashboard and create an IAM user.
-
Use the Add Permissions button in the Permissions tab to add permissions for the IAM user as shown here:
{
    "Version": "2012-10-17",
    "Statement": [
        {
            "Effect": "Allow",
            "Action": [
                "ec2:DescribeInstances",
                "ec2:DescribeVpcPeeringConnections",
                "ec2:DescribeVpcs",
                "ec2:DescribeSubnets",
                "s3:ListAllMyBuckets",
                "s3:ListBucket",
                "lambda:ListFunctions"
            ],
            "Resource": "*"
        }
    ]
}
Create Access Keys
To create access keys for the IAM user:
-
In the IAM Dashboard, click on Users in the left-hand pane.
-
Click on the CloudIM user you created, previously.
-
In the User Details page, click on the Security Credentials tab.
-
Create access keys for the user.
Configuring CloudIM
To configure CloudIM:
-
Click Administration > Third Party Authentication in the Navigation pane to display the Third Party Authentication page.
-
Click Add an Authentication Profile to display the Add an Authentication Profile wizard to create a new authentication profile.
-
Specify the profile's Basic Details:
-
Type a unique profile name.
-
Add a meaningful description (e.g., Riverbed CloudIM Authentication Profile).
-
Choose AWS Signature for the Authentication Method.
Click Next to advance to the Authentication Parameters page.
-
-
Specify the authentication details required for the Authentication Method you chose:
-
Set the Version to AWS Signature Version 4.
-
Type your AWS Access Key ID.
-
Type your AWS Secret Access Key.
Click Next to advance to the Private or Public Endpoint page.
-
-
Click Next on the Private or Public Endpoint page without making any changes and advance to the Test Query page.
-
Configure a test query:
-
Choose GET and, for the URL, use a region accessible to the IAM user you created earlier. (For example, ‘us-east-1’. https://ec2.us-east-1.amazonaws.com/?Action=DescribeInstances&Version=2016-11-15)
-
Accept the default HTTP Headers.
-
Accept the default HTTP Payload.
Click Next to advance to the Verify Response page.
-
-
Click the Run Test Query button on the Verify Response page and check for a status of 200 in the Output panel.
-
Click Next to advance to the Review page.
-
Click Submit to finalize the authentication profile.
-
On the Third Party Authentication page, verify that the profile is Enabled.
-
Click Administration > Edges & Data Sources in the Navigation pane to display the Data Sources page.
-
Click the CloudIM tab.
-
Click Add a CloudIM Data Source to display the Configure CloudIM Data Source dialog.
-
Type the name of the CloudIM data source that you're adding.
-
Choose the authentication profile you configured earlier.
-
-
Click Save to finalize the data source definition.
Removing CloudIM from Riverbed IQ
To remove CloudIM from Riverbed IQ:
-
Click Administration > Edges & Data Sources in the Navigation pane to display the Data Sources page.
-
Click the CloudIM tab.
-
Select your CloudIM data source and click the ... menu. Click Delete Data Source and confirm that you want to delete the selected CloudIM data source.
-
Click Administration > Third Party Authentication in the Navigation pane to display the Third Party Authentication page.
-
Select your authentication profile and Disable it. The Disable Authentication Profile dialog will appear, warning you of any runbooks that rely on the selected profile. Click Disable Anyway to continue de-activating the profile.
-
Contact Riverbed IQ Support to de-activate the CloudIM feature.
Troubleshooting CloudIM
This section details corrections for potential difficulties you may experience when configuring and connecting to CloudIM.
Your test query returns a status of 401
-
Check that the AWS Access Keys do not have a typo and retest using the Test Query page.
-
Use the AWS CLI from a desktop machine and execute this query:aws EC2 describe-instances --region <reqion used in test query>
-
Verify that the AWS IAM user has read permissions set.
-
Check the AWS firewall and security settings.
The Theater View shows no data
CloudIM queries for updates every six hours. You may need to wait for the next data ingest to pull the data.
The Theater View still shows no data after more than six hours
Check that the authentication profile you're using is configured correctly.
-
Check that the CloudIM data source uses the correct authentication profile:
-
Click Administration > Edges & Data Sources in the Navigation pane to display the Data Sources page.
-
Click the CloudIM tab.
-
Select your authentication profile and verify that the authentication profile is correct.
-
-
Verify that the authentication profile 1.) is enabled, 2.), works:
-
Click Administration > Third Party Authentication in the Navigation pane to display the Third Party Authentication page.
-
Select your authentication profile.
-
Confirm that the profile is Enabled.
-
Click the ... menu and choose Edit.
-
Go to the Test Query page:
-
Choose GET and, for the URL, use a region accessible to the IAM user you created earlier. (For example, ‘us-east-1’. https://ec2.us-east-1.amazonaws.com/?Action=DescribeInstances&Version=2016-11-15)
-
Accept the default HTTP Headers.
-
Accept the default HTTP Payload.
-
-
Click the Run Test Query button on the Verify Response page and check for a status of 200 in the Output panel.
-
-
You've executed all the troubleshooting actions and the Theater View still shows no data
Contact Riverbed IQ Support.