Muting Applications and Locations
Riverbed IQ Ops customization enhancements provide the capability to tag specified non-critical Applications![]() An entity type representing software applications deployed in the customer environment that are monitored for performance and anomalies. and Locations
An entity type representing software applications deployed in the customer environment that are monitored for performance and anomalies. and Locations![]() An entity type representing physical or logical locations in the customer environment where entities are deployed and monitored. with the Mute App and Mute Apps at Location custom properties so they are no
longer processed through the Analytics Pipeline and do not appear in Incidents
An entity type representing physical or logical locations in the customer environment where entities are deployed and monitored. with the Mute App and Mute Apps at Location custom properties so they are no
longer processed through the Analytics Pipeline and do not appear in Incidents![]() A collection of one or more related triggers. Relationships that cause triggers to be combined into incidents include application, location, operating system, or a trigger by itself..
A collection of one or more related triggers. Relationships that cause triggers to be combined into incidents include application, location, operating system, or a trigger by itself..
Muting Applications
To prevent an application from generating an incident, you can go to the Applications Explorer and you can set the Mute App Custom Property to True.
-
-
Navigate to the Applications Explorer Page:
-
Click the Launchpad button ⁝⁝⁝.
-
Click IQ Ops > Management.
-
In the Management page, click the Hamburger Icon, then click Explorer - Applications.
-
-
-
Select the set of applications for which you no longer want incidents reported.
-
Click Set Custom Property.
-
In the Name combo box select the Mute App custom property. Set it to True.
-
Click Apply when you want to submit the changes.

To see which applications have been muted, use the Applications Explorer to search for all applications that have the Mute App custom property set to True.
To run this search go to Explorer > Applications. If the Mute App filter does not show up in the Filters section, go to the ... at the top of the filters section and select Customize List. Then add the Mute App filter to the list of filters. After the Mute App filter is visible expand it. Select the "True" value and click Apply Filters. This outcome looks as follows:
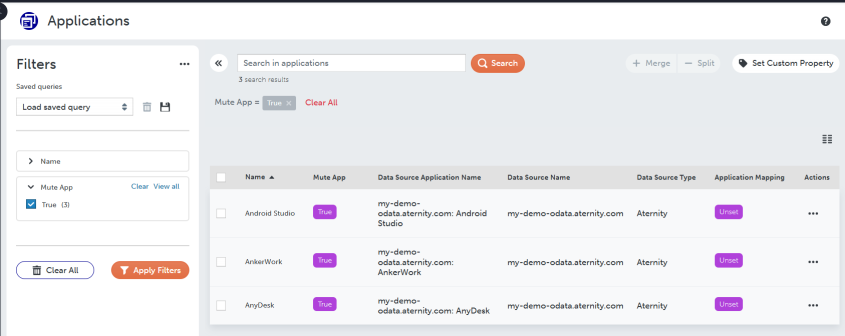
Whenever you see an incident on an application that you no longer want to generate incidents on, follow the procedure above to set the Mute App custom property to True for that app. If you want to generate incidents on that application again, set the value of the Mute App custom property to False for that application.
Muting Locations
To prevent all applications at a location from generating incidents, you can go to the Locations Explorer and you can set the Mute Apps at Location Custom Property to True.
-
Navigate to the Explorer > Locations.
-
Select the set of locations that you no longer want incidents reported for.
-
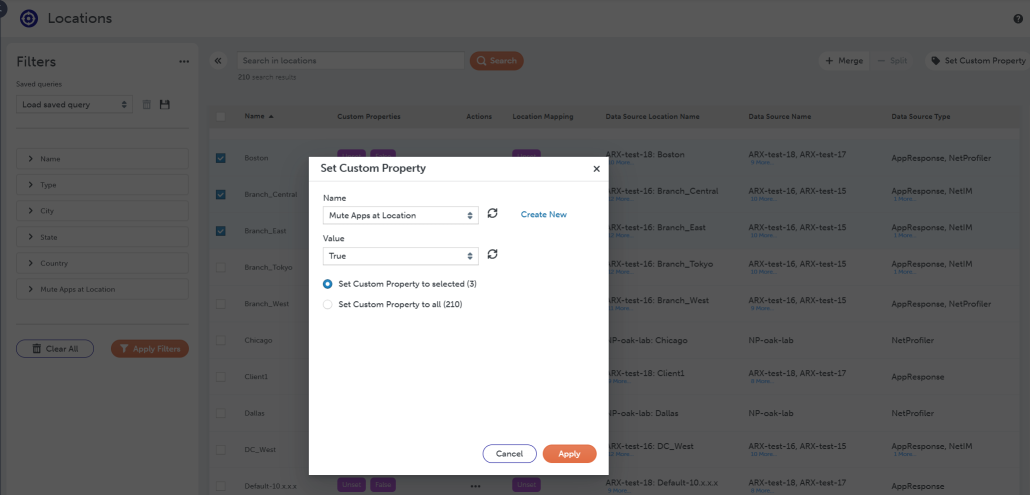
Click Set Custom Property.
-
In the Name combo box, select the Mute Apps at Location custom property and set it to True.
-
Click Apply to submit the changes.
To see which locations have been muted, use the Locations Explorer to search for all locations that have the Mute Apps at Location custom property set to True. To run this search just go to Explorer > Locations. If the Mute Apps at Location filter does not show up in the Filters section, go to the ... at the top of the filters section. Select Customize List and add the Mute Apps at Location filter to the list of filters. After the Mute Apps at Location filter is visible expand it. Select the True value and click Apply Filters. This outcome looks as follows:
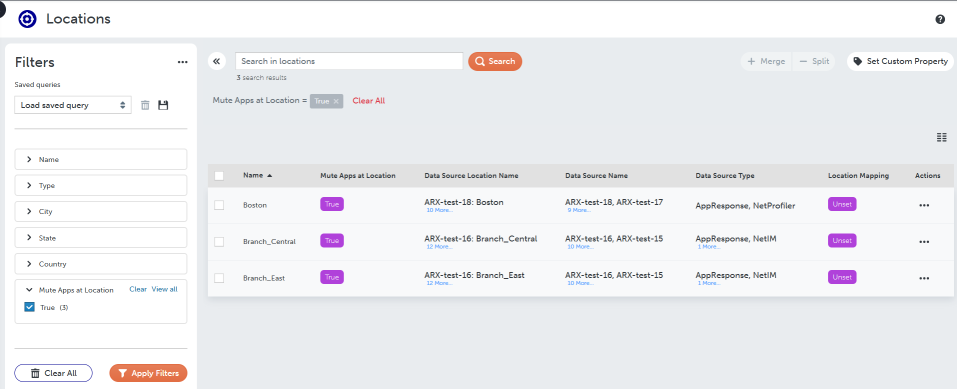
Whenever you see an incident on an application at a location that you no longer want to generate incidents on, follow the procedure above to set the Mute Apps at Location custom property to True for that location. If you want to generate incidents at that location again, set the value of the Mute Apps at Location custom property to False for that location.