Connect the Packet Capture Module to a CIFS Share
Common Internet File System (CIFS) storage allows you to harvest PCAP Packet Capture. A file format that contains captured network packet data, typically used for network analysis and troubleshooting. files to a remote CIFS or Server Message Block (SMB) share from a supported endpoint. Use this storage type when you want harvested files written directly to a network share rather than a cloud repository.
A CIFS Storage Profile A configuration that defines where the stores PCAP files, specifying the storage type and connection details for customer-managed repositories. contains only the CIFS Path (for example, \\remote-host\main\pcm_harvests\ or smb://remote-host/main/pcm_harvests). You cannot specify credentials in the storage profile. Authentication to the share is configured on the endpoint or file server, not in the storage profile itself.
Set up guest write access to the CIFS share
Before you create a CIFS storage profile, an administrator must configure the remote share so that endpoints can write harvested PCAP files without supplying credentials in the storage profile. The exact steps depend on your file server platform, but the general workflow is as follows:
-
Create a dedicated folder on the file server to receive harvested PCAP files.
-
Share the folder over SMB/CIFS and record the UNC path (for example,
\\fileserver\pcm_harvests). -
Configure share permissions so that the account used by the endpoint can create and write files in the share. For guest access, grant write permission to the guest or anonymous account supported by your environment.
-
Configure NTFS or underlying file-system permissions on the folder so that the same account can create and modify files, but does not require read access to other content on the share unless your operational model requires it.
-
On the file server, enable guest or anonymous SMB access if your security policy allows it. Many environments restrict guest access. If guest access is not permitted, configure the endpoint to authenticate to the share using a domain or local account that has write access, rather than relying on unauthenticated access.
-
From a representative endpoint, verify that you can create a test file in the share using the same access method the Packet Capture Module will use during harvest.
Creating a storage profile for a CIFS share
To create a CIFS storage profile:
-
Navigate to the PCM page:
-
Click Apps in the left menu.
-
Click Apps Library.
-
Open Packet Capture Module.
-
-
Click the hamburger icon and select Packet Capture Configuration in the side bar.
-
Click the Storage Profile tab.
-
Click Create Storage Profile.
-
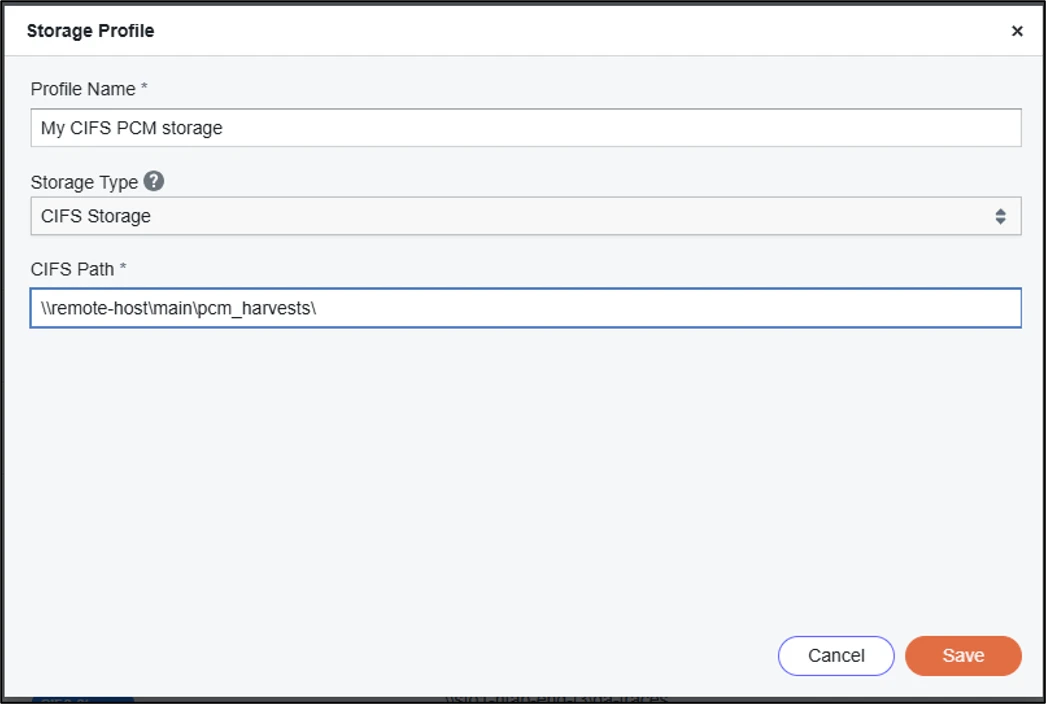
Enter a profile name.
-
Select CIFS Storage from the storage type dropdown.
-
Enter the CIFS Path using
smb://server/share,//server/share, or\\server\shareformat. The path must include both the server name and share name. -
Click Save. Your CIFS storage profile is now set up. You can specify this storage profile for future harvest commands.
After a harvest completes, use the chain icon in harvest history to copy the target path to the clipboard. For more information, see Lists of Harvests.